Sometimes we want to share our test solution to the community, which is basically Testing as a Service. In this blog, let's see how a package can be published step by step. Packages or plugins can be implemented for both Cypress and Playwright, but in this case I will illustrate a Cypress example.
What we will go through is:
Since npm repo may sometimes take too long, and you may not wanna just pay the 7 dollars/month to host your packages in the official npm private registry; you can configure npm settings to use a private repo which basically mirrors the global npm repo. In this way, you use a proxy in your own network. This is done by Nexus settings.
If the PC configuration is directed towards Nexus, but you wanna use npm, you have to create a .npmrc file including the line:
The other way is adding the config into package.json file:
- Npm account
- Initializing the project
- Implementing in TS
- Compiling TS
- Publish
- Usage in Other Projects
1. Npm init
npm is the node package manager. (see) Packages can be queries via repo or api.Since npm repo may sometimes take too long, and you may not wanna just pay the 7 dollars/month to host your packages in the official npm private registry; you can configure npm settings to use a private repo which basically mirrors the global npm repo. In this way, you use a proxy in your own network. This is done by Nexus settings.
If the PC configuration is directed towards Nexus, but you wanna use npm, you have to create a .npmrc file including the line:
registry=https://registry.npmjs.org/The other way is adding the config into package.json file:

After the settings are done and having an account on npm, the command
After npm account is ready,
npm login is executed. This will forward you to the browser to login. After login is completed, you can verify your session via npm whoami. After npm account is ready,
npm init command starts creating a package.json file by asking to fill in several attributes. You can pass -y flag to set all fields to default values. Eventually when the package is publisg these attributes will be seen on the npm repo like author, version and dependency values. A sample package.json file would look like: 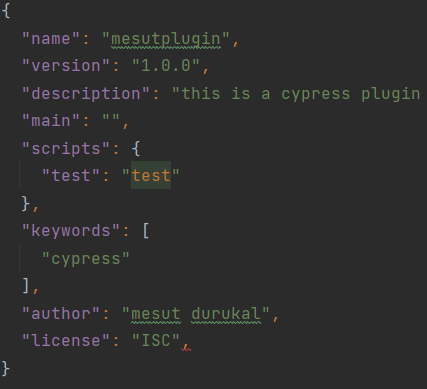
2. Implementation with Typescript
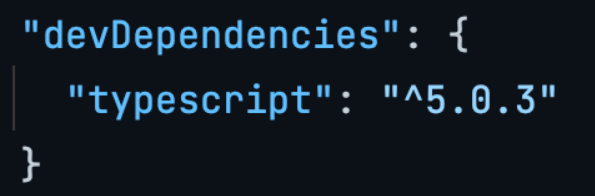
First get typescript since we want to use it as the programming language:npm install --save-dev typescript. We will use it only for development purposes, so we can add it as a dev-dependency (-D flag does the same). We will see dependency types below. After we add the dependency, it should be in the package.json:
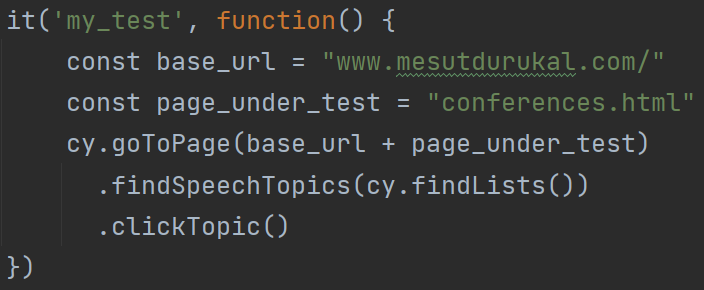
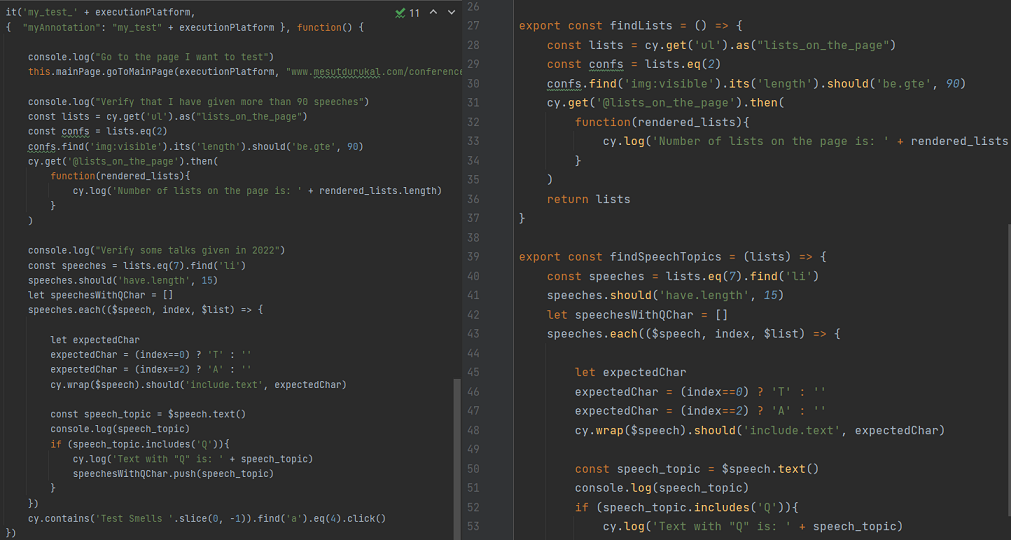
Suppose we have a test case, where implemented several steps. We can move some of those steps into another class as function. (One paranthesis about the implementation: Quick note regarding the types vs interfaces. Both can be used to declare typed objects. But refer this link for more details.) Let's create a new file under a seperate folder (src/my_functions.ts) and export functions. Later, they can be imported into any project and used to perform those steps. On the image below, there is a test implemented from scratch on the left, where some steps are moved to exported functions in a new file on the right. [Please dont mind the quality of the implementation, that is not our concern as of now. There are locators inside the test, locators are not selected properly, code is not efficient. But we might have another blog to discuss about the code quality.]
We can add a special function which will be later used for registering function calls as Cypress custom commands.
									export const registerCommand = () => {
										Cypress.Commands.add("goToPage", (url) => {
											goToPage(url)
										})...

									}
Index File
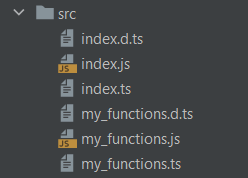
When we are done, let's create an index file in the same directory: src/index.ts. In the index file all funtions are declared:export * from './my_functions'. Notice that extension is not needed to address the file here. One more reminder is, these files are generally collected under a reasonably named folder such as src, dist or lib.3. Compiling TS
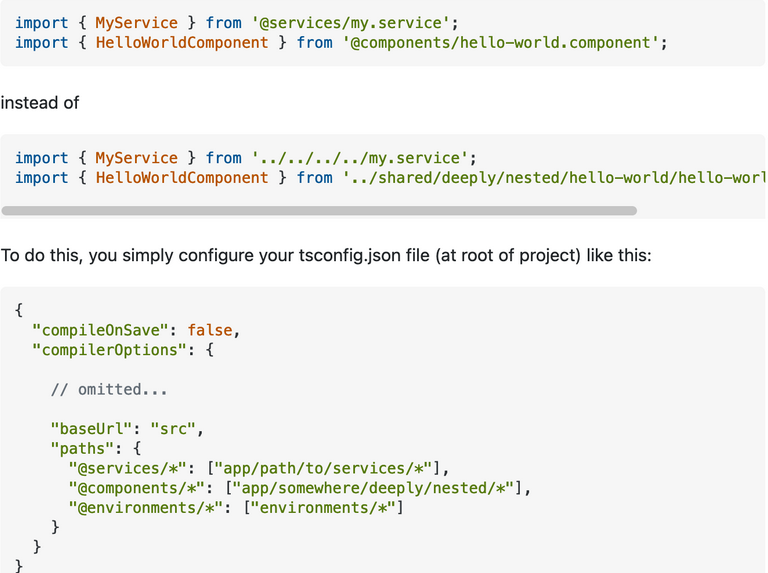
As we discussed in another blog, TS code needs to be compiled. We will use tsc command for this, but first let's initialize:npx tsc –init . This will create a tsconfig file for us. One example is below:

Be aware the included and excluded folders. OutDir can be set to either a different or the same folder as src. (but of course different is better) Now, we are ready to compile!
npx tsc. After compiling we will see the generated files in the OutDir. You may have some errors like unresolved cy commands. Since you are running outside the cypress folder, it is not in the relevant namescape. But no worries, the dependency will be imported into some other projects and already be executed with Cypress.
4. Publish the Package
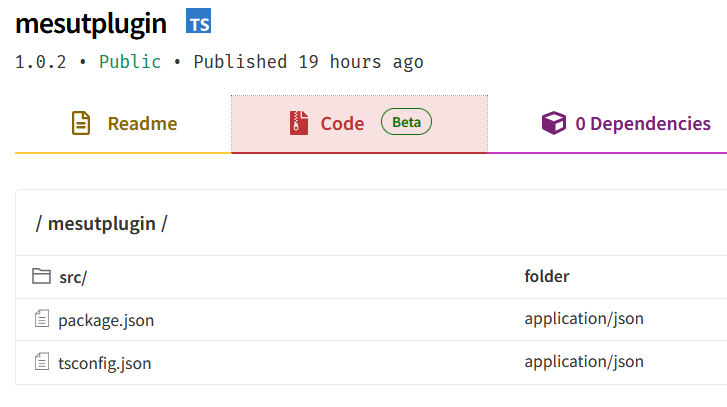
Since compiled files are under the output folder shown in tsconfig, we can exclude src folder from the published package. For this purpose, .npmignore file is used. Now we are ready for the publish. First let's address our entry file in the package.json file."main": "src/index.js". Beware that it is not .ts anymore, since we compiled it is js file now. Now we can do npm publish. If you set the package name which is already taken, you will get an error. (it might be fixed later, but at first it was confusing to me, i got 403 when i tried to publish a conflicting package name.)
5. Using the Package in Other Projects
After the package is available in npm repo, it can be downloaded into any projects bynpm i mesutplugin. i is for install, so this command will install the dependency. We will see that package & package.lock files are updated and node_modules folder includes the downloaded dependency. In the package.lock file, we can see the npm repo addresses (registry/nexus) which we discussed in the first part.Scoped Packages
You may realize in some dependencies, there is an '@' sign (scoped packages: see an example below), which indicates that this dependency belongs to a group. For publishing scoped packages, you have to pay. [402 You must sign up for private packages : @org1/pkgname …] Other than the dependencies, consumed by the project, there are others:- Dev Dependencies They are installed on npm install on a directory that contains package.json, unless you pass the --production flag or if the NODE_ENV=production environment variable is set. But they are not installed on npm install "$package" on any other directory, unless you give it the --dev option.
- Peer Dependencies They are used when you create your own package. They are not require in the project, but the project can only be used with this peer dependency. This means, the Host having the project that we are developing, should also have the peer dependency. We can consider this as a compatibility. If there is a version (you might have a look into semantic versioning) issue, you will be notified. (it still runs though)
Cypress Custom Commands
After the dependency is installed, we are ready to use the served functions. But first we can register those function calls as the custom commands in the commands file:import {registerCommand} from 'mesutplugin'
registerCommand() [REMINDER: Files and folder are pointed in config file. commands file is for custom commands. Index file is for before,beforeEach and all fixtures. Plugins file is for enabling some auto actions. Inside commands file, fixture can be written as well.]
Now, instead of implementing all the steps from scratch, we can just call the relevant functions: